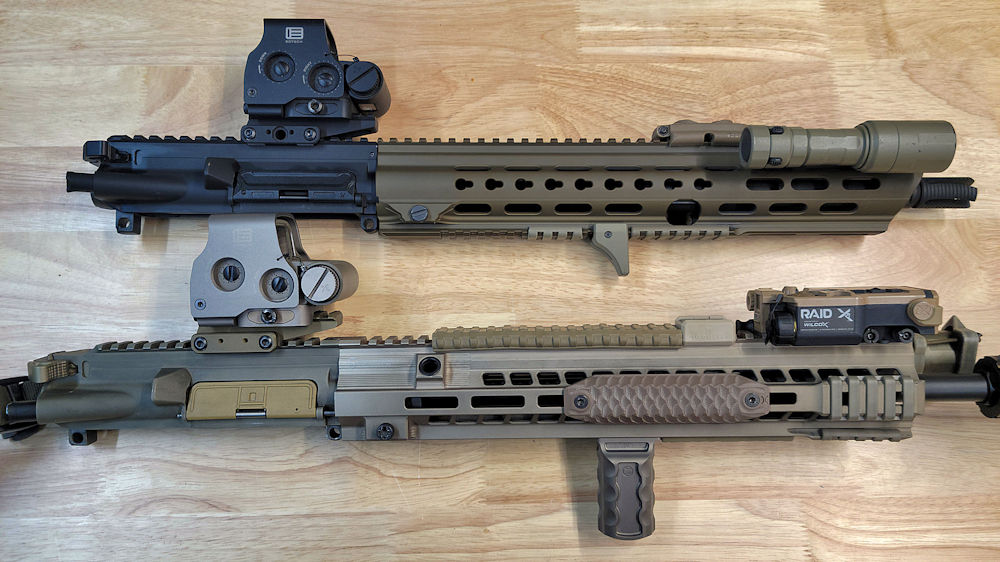
Building an HK 416 Clone
While on the surface, the HK 416 looks outwardly similar to an AR-15, taking the plunge into building your own 416/416-based clone and its handful of proprietary parts may be overwhelming. The differences between an AR-15 and HK 416 are not something to be feared, and by the end of this article you will understand the differences between the major generations of the HK 416, what parts to use for your specific build, and some tricks and techniques to make your building process easier. This article is structured as a builder's guide for the hobbyist and will cover several tricks and techniques to make the overall building process easier and help you avoid frequent mistakes that many builders encounter. For the sake of brevity, I will focus primarily on assembling a 416-spec upper as that contains the majority of the differences from an AR-15. I will briefly discuss how to assemble a 416 lower as well; however, it is not the primary focus of this guide as the 416 platform is compatible with Mil-spec AR-15 lowers. Furthermore, this article assumes you already have an understanding of the assembly process for an AR-15 and already own the common tools needed to perform armorer-level maintenance, as many of these same tools and processes will be followed when building your 416.
Upper
Before starting your 416 build, it is essential to understand some of the broad differences between the various generations of HK 416. For simplicity, I will not discuss each variant of 416 ever developed, but I will instead focus on the two most common patterns with the largest aftermarket support and parts availability, namely the 416 A3 and 416 A5.
The A3 and A5 have a number of differences in their outward appearance but for a builder, the most important are the internal differences between the barrel extensions and barrel nuts. The older 416 A3 utilizes a male index pin located on the barrel extension itself, not unlike an AR-15, albeit significantly thicker for improved durability (This also means you cannot use an AR-15 barrel in a 416 upper receiver). When the 416 A5 was developed, HK further widened the indexing area and reversed the male and female ends, meaning that when assembling a 416 A5-spec upper, the male mating end is now on the receiver, as opposed to on the barrel extension as with the A3. Along with the change to the barrel extension, the 416 A5 uses a coarser thread pitch on the barrel nut and a pinned piston bushing to even further improve durability. For the builder this means you must source a different barrel nut and piston bushing when building a 416 A3 vs. 416 A5-pattern upper (Bushings are generally already installed when purchasing an upper receiver, but not always). The rail spacing on the 416 A5's upper receiver and handguard was also changed so the full rail is continuous, thus removing the unusable picatinny rail spaces between the upper receiver and the handguard. Note that 416 A5 handguards are compatible with 416 A3 uppers, though they will still have dead space where the handguard meets the receiver. The table below summarizes these differences.
| Part | 416 A3 | 416 A5 |
|---|---|---|
| Barrel Extension | Male | Female |
| Barrel Nut | "Fine" threads | "Coarse" threads |
| Piston Bushing | Threaded | Pinned |
| Rail Spacing | Scalloped & "Dead Space" | Continuous |
For a beginner interested in building a 416, I recommend building around the 416 A3 specification as it currently has significantly more parts availability, with the BRN-4 and HK MR556A1 both made to this specification. At the time of writing this, HK USA has recently released the MR556A4 which is built to the 416 A5 specification save for a few “civilianized” features. For those aspiring to build an A5 upper, third party 416 A5 compatible parts and uppers may also be sourced from Haus Manufacturing or Nefarious Arms.
Tooling
Assuming you already have the standard tooling to assemble and maintain an AR-15, the only additional tool you will need is a compatible barrel nut wrench. A 416-compatible barrel nut wrench is a bit harder to come by, but in a pinch some builders have been able to use a Geissele barrel nut wrench which fits, albeit not optimally, in the female slots on the HK416's barrel nut. Preferably, you should use a dedicated barrel nut wrench, such as those made by Brownells, HK Parts, or Nefarious Arms. Some patience may be required in sourcing a proper barrel nut wrench as many of these manufacturers only release their barrel nut wrenches in batches, thus they can be out of stock for extended periods of time.
Barrel
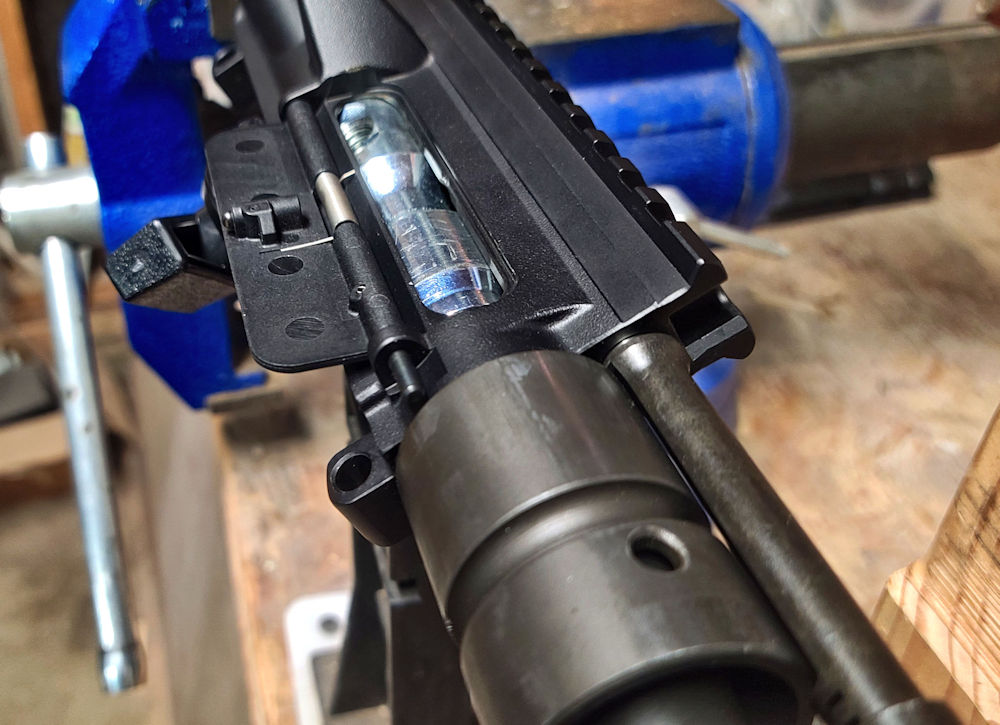
The overall process of installing a HK416 barrel is very similar to the process used for an AR-15, however, if you are using a genuine HK upper receiver and barrel, it tends to be difficult to seat the barrel into the upper receiver as HK uses very tight tolerances between the two for precision. If you are unable to push the barrel extension into the upper receiver by hand, I recommend using a mallet or a press to seat the two. Applying a very light coating of grease or anti-seize (I prefer Aeroshell 33MS or a ceramic-based anti-seize) to the outside of the barrel extension is recommended to further ease this process.
Once the barrel is seated into your upper receiver (Note: it does not need to be fully seated at this time as the barrel nut itself will push the barrel in the remainder of the distance, just ensure it is indexed properly to avoid damaging your upper receiver), thread on the barrel nut and torque to 110 ± 10 Nm (81 ± 7 ft. lbs.). This is a significantly higher torque spec than on an AR-15 so ensure you have the upper receiver fully secured in a reaction rod and vise before applying any torque to prevent damage.
When sourcing a muzzle device, note that most US-made barrels use the ½×28 thread pitch on the muzzle, however European-made barrels (such as the HK MR223) use the 15×1 RH metric thread.
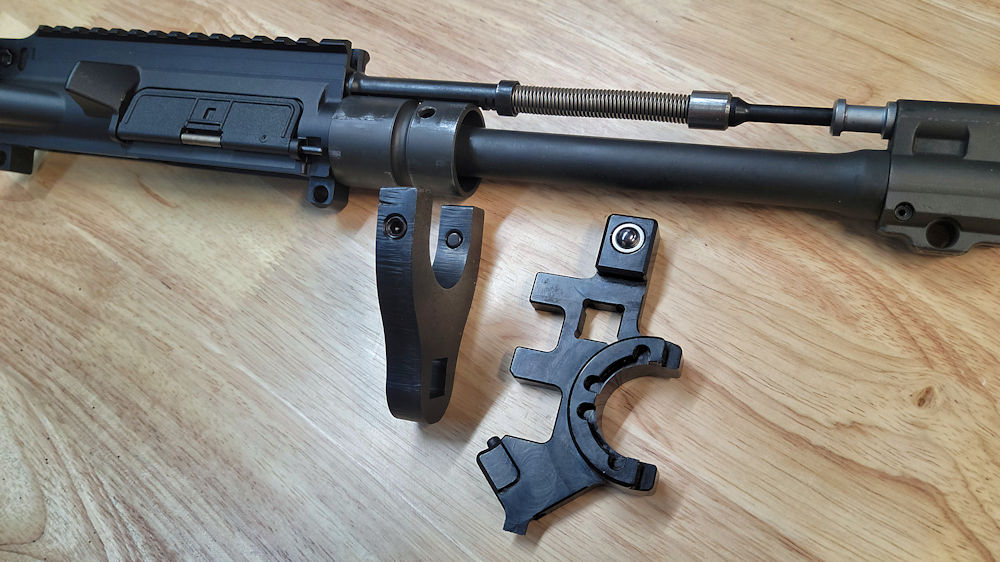
Gas Blocks
Unlike the AR-15, the gas system on the 416 is the same length regardless of the length of your specific barrel. While this makes sourcing the piston rod simple, if you're using a genuine HK vented gas block, you will need to ensure you are using the correct version for your build. HK makes two gas blocks, one engraved with a '10”' (10 in.) which is intended for use with short barrels i.e. 10.4”, and the other - normally unmarked gas block - is intended for use on all other barrel lengths from 14.5” and up.
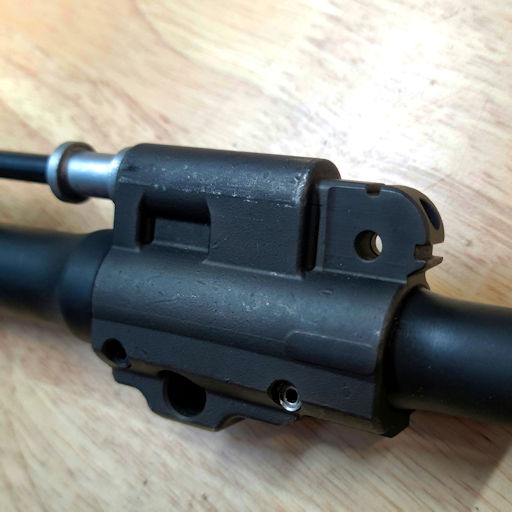
To install the gas block, first, index the male notch on the top of the gas block with the corresponding female notch on the top of the barrel. Once the gas block is indexed, simply punch the roll pins into position using a ⁵⁄₃₂” size punch. I recommend applying a generous amount of lubricant to the roll pins to ease installation and mitigate the risk of corrosion as the coiled roll pins used on the gas block have a high surface area that can rust and, in the event you want to replace or remove your gas block, may result in the roll pins becoming stuck.
Adjustable Gas Blocks
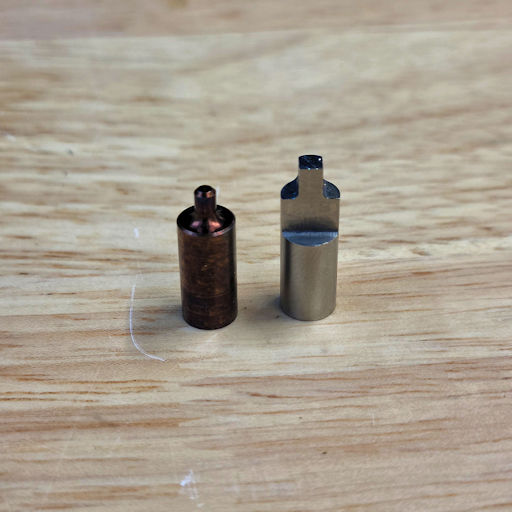
HK describes their gas blocks as “self-regulating”, and, while they're reasonably gassed when firing normally, you may still encounter over gassing when shooting suppressed. If you plan to shoot suppressed a significant portion of the time, I recommend using an aftermarket adjustable gas block for your build instead. There are only two aftermarket options (more if you include certain rarer OEM gas blocks, however those also require major modification to function properly) for adjustable gas blocks for the 416 platform - one made by Waffen Burk and the second being the Nefarious Arms NA5, which is based on the HK 416A5's adjustable gas block. Of these two gas blocks, the NA5 is a more tunable option while also being significantly less prone to carbon locking. Either gas block will work if you are using a traditional suppressor, however you may experience failures to feed when using the suppressed setting on the Waffen Burk if combined with a low backpressure suppressor. Whichever option you choose, both will install using the 12 o'clock indexing notch at the top and a coiled roll pin to retain the gas block.
I briefly mentioned the HK 416 A5's adjustable gas block earlier and it should be noted that genuine HK 416 A5 and MR556A4 gas blocks have a different inner diameter and cannot be interchanged without significant modifications to either the gas block or the barrel (unless you source a compatible barrel i.e. an OEM HK MR556A4 barrel).
Ejection Port Cover
Any AR-15 ejection port cover will fit a 416 upper, however, if you opt to use HK's OEM ejection port cover, it differs from the standard c-clip retention found on Mil-spec AR-15 and instead utilizes a roll pin which sits in a groove on the axle rod to retain it on the upper receiver.
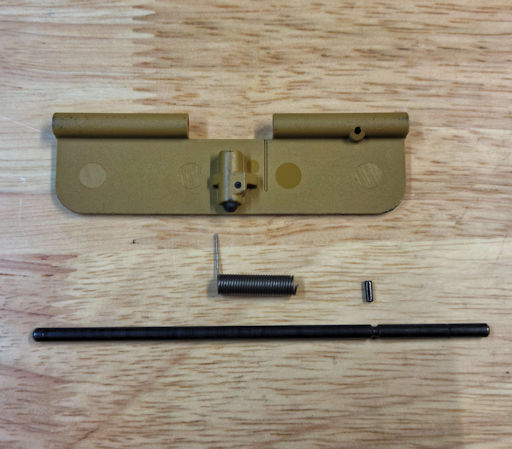
Before you install the ejection port cover locking roll pin, I recommend checking that the ejection port cover opens and closes without requiring an unusual amount of force, especially if you are not using all 100% genuine HK parts. I have personally experienced issues with third-party manufactured “HK-spec” parts being imperceptibly bent or oversized, and while they will install, they can cause the entire ejection port cover to bind and seize in place.
To install an HK ejection port cover's locking roll pin, I have found it easiest to use a rotating vise or reaction rod to lay the ejection port cover as flat as possible. Next, use a small roll pin punch to drive the locking pin into place. The locking roll pin does not require any significant amount of force to be installed, and should not feel overly difficult to drive into place. If you encounter difficulty driving in the locking roll pin, check to confirm that the ejection port cover door is properly aligned so the locking roll pin will be driven through the groove on the ejection port axle.
Lower
The 416 platform is compatible with Mil-spec AR-15 lowers, however you should change your buffer and buffer spring to HK's versions, as the buffer weight and spring tension are designed to optimize the 416 to function reliably in all environments.
One area where some builders run into compatibility issues with that have been modified with aftermarket triggers. This is because the 416 has a firing pin safety on the rear of the bolt carrier that is disengaged by contacting the top of the hammer. Some aftermarket trigger manufacturers shorten the hammer which results in failures to fire when used on a 416 upper.
If you decide to build a 416 clone lower, understand there are differences in the lower when compared to an AR-15, as well as differences in parts compatibility between 416A3 and 416A5 lowers.
Buffer Tube
Perhaps the biggest stumbling block when building a 416 lower is the buffer tube/receiver extension. An AR-15 buffer tube can be used, however, 416 lowers (both A3 and A5) hold the buffer retaining pin in place via a horizontal roll pin as opposed to being held in place on the lip of the buffer tube as on AR-15s. In the 416, the buffer retaining pin is reinforced which prevents the tip of the pin from breaking and becoming lodged in the fire control group, which, albeit rare, is an issue that can occur on AR-15s especially when using heavier buffers and/or springs. Of note to the home builder - the HK 416 buffer retaining pin is a different profile when compared to an AR-15 buffer retaining pin and thus AR-15 buffer retaining pins cannot be substituted into a 416 lower as they will not clear the retaining roll pin.
Lastly, if you are intending to build a 416 A5 lower with an AR-15 buffer tube, you will not be able to the correct extended castle nut as there are insufficient threads on a Mil-spec buffer tube for the extended castle nut. The easiest solution to this issue is to use a genuine 416 A5 buffer tube. However, another cheaper alternative is to use an “enhanced” AR-15 buffer tube, such as those made by Aero Precision or Strike Industries, as both of these have additional threads allowing the use of an extended castle nut.
Safety Selector
An oft overlooked albeit very welcome safety feature of the HK 416 is the ability to place the rifle on safe even when the hammer has been dropped. This is especially if you need to clear certain malfunctions. A question I have frequently seen is whether you need to use HK's safety selector to make use of this feature, or whether you can use an AR-15 selector. The answer is the safety feature is part of how the trigger functions and is selector-agnostic. In other words, any AR-15 selector of your choosing will function normally in a 416 lower.
If you are building a 416 A5 clone lower and you wish to use HK's OEM selector, this has it's own unique installation process not too dissimilar from installing their ejection port cover. You have a steel axle with two semi-circular protrusions on each side. This is where the selector will be locked in place via a small roll pin. HK manufactures two distinct selector levers, one for the left-side which can be identified by a small tab on the underside of the selector lever (this is designed to sit against the overtravel stop tabs on a select-fire lower), and a right-side selector lever which lacks the tab. Despite the selectors' naming, you can install the selector levers on either side of the rifle or use two identical levers, one on each side (for example if you prefer to omit the tab on the left side lever, you can use a right-side lever on both sides), or choose to only use one lever.
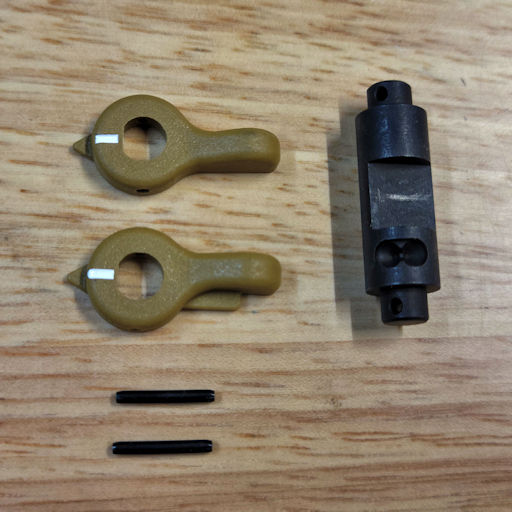
I have found the easiest method of installing the HK safety selector is to install one lever onto the axle before placing it into the lower. This can be performed by placing the axle in a vise (anti-marring jaws are recommended here as the levers are polymer and can thus be deformed easily) or against a flat surface then driving the pin through the lever and into the axle. Be very careful when punching in your locking roll pin as it is deceptively small. While you can install the lever with a ¹⁄₁₆” punch, if you ever need to remove the selector lever, understand that the selector axle is a smaller diameter than the selector lever, and a ¹⁄₁₆” punch can bind in place when removing the selector lever. Thus, I recommend purchasing a 0.039” sized punch for disassembly, such as those from Brownells.
Once you have installed one of the selector levers, slide the axle into your disassembled lower (at a minimum remove the pistol grip and selector detent), place the lower into a magwell block or vise, then install the opposite side selector lever. Reinstall your safety selector detent and pistol grip and test for function.
416A5 Differences
Beyond this, the 416's lower did not see many other notable differences from the AR-15 lower until the 416A5 which are as follows:
- Trigger guard pinned in place using two roll pins as opposed to the traditional rear roll pin + front detent as seen on AR-15 Mil-spec trigger guards.
- Magazine well profile was reverted to follow the same angle as the AR-15. Previous versions of the 416 had a horizontal magazine well profile designed to improve feeding reliability with the older magazines of the time.
- Bolt catch and magazine release were both made ambidextrous and guards/fences were added to the forging to prevent accidental actuation of either control. These parts can be retrofit to a 416A3 or AR-15 lower, however the ambidextrous bolt catch requires a channel to be milled into the lower.
- Buffer tube threads were extended and an extended castle nut, which covers all the threads, was added. The extended castle nut cannot be used on 416A3 buffer tubes or on most AR-15 buffer tubes due to clearance issues.
Closing
Building your own 416 is a rewarding process that can be as simple or difficult as you make it. On one end, it can be as simple as putting together the upper and barrel and attaching it to your favorite AR-15 lower, or, if you wish to make a near-perfect clone of a HK 416, you can go even further and use all genuine HK parts to have it look just the way you want. Whichever route you take, you will have a dependable rifle with a proven track record suitable for a wide variety of use cases.
Last Updated 2025-07-18